THE MUSIC BOX
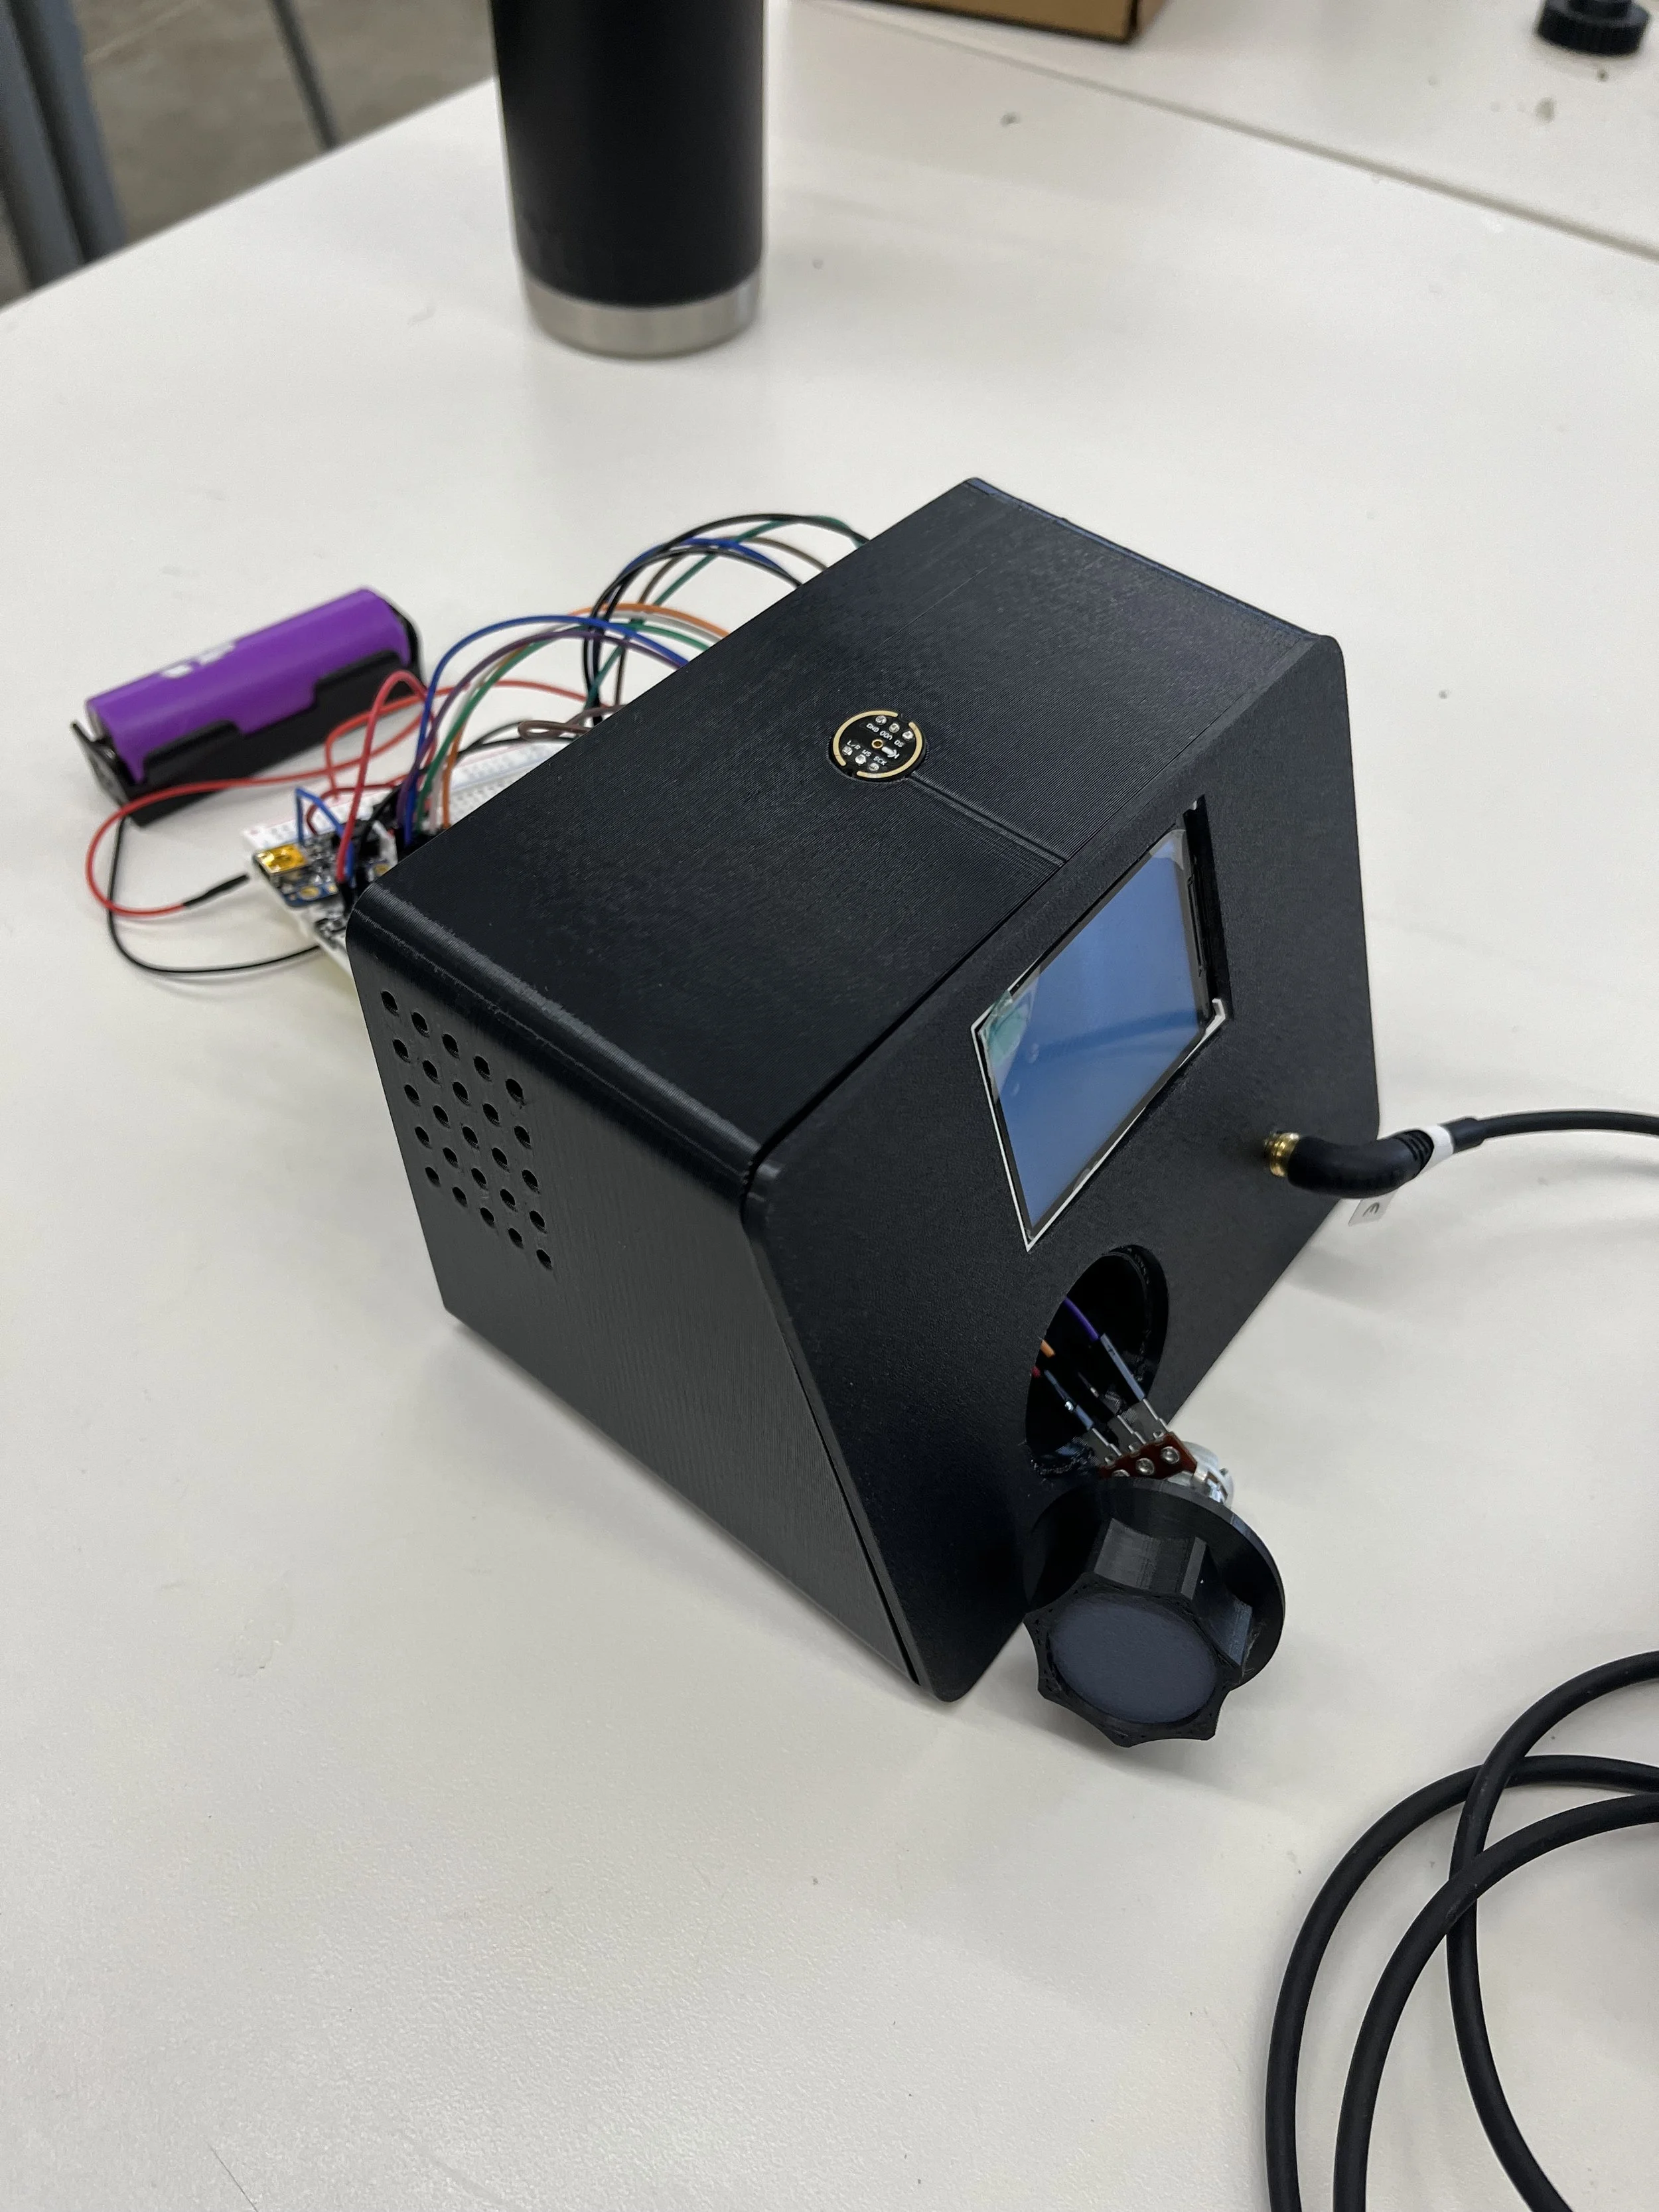
For my final project of my class, Introduction to Digital Fabrication, I built a device that helps you focus while studying by taking distracting ambient noise and converting into listenable, calming music. The system is generative, continuously recording audio, processing it and then playing it out through headphones.
I work in a noisy office space so often rely on headphones to block out sound. While I love to listen to music, often the music itself is distracting. I wanted to find a balanced middle ground that filtered out the noise but focused me on my work, instead of distracting me.
CIRCUITRY
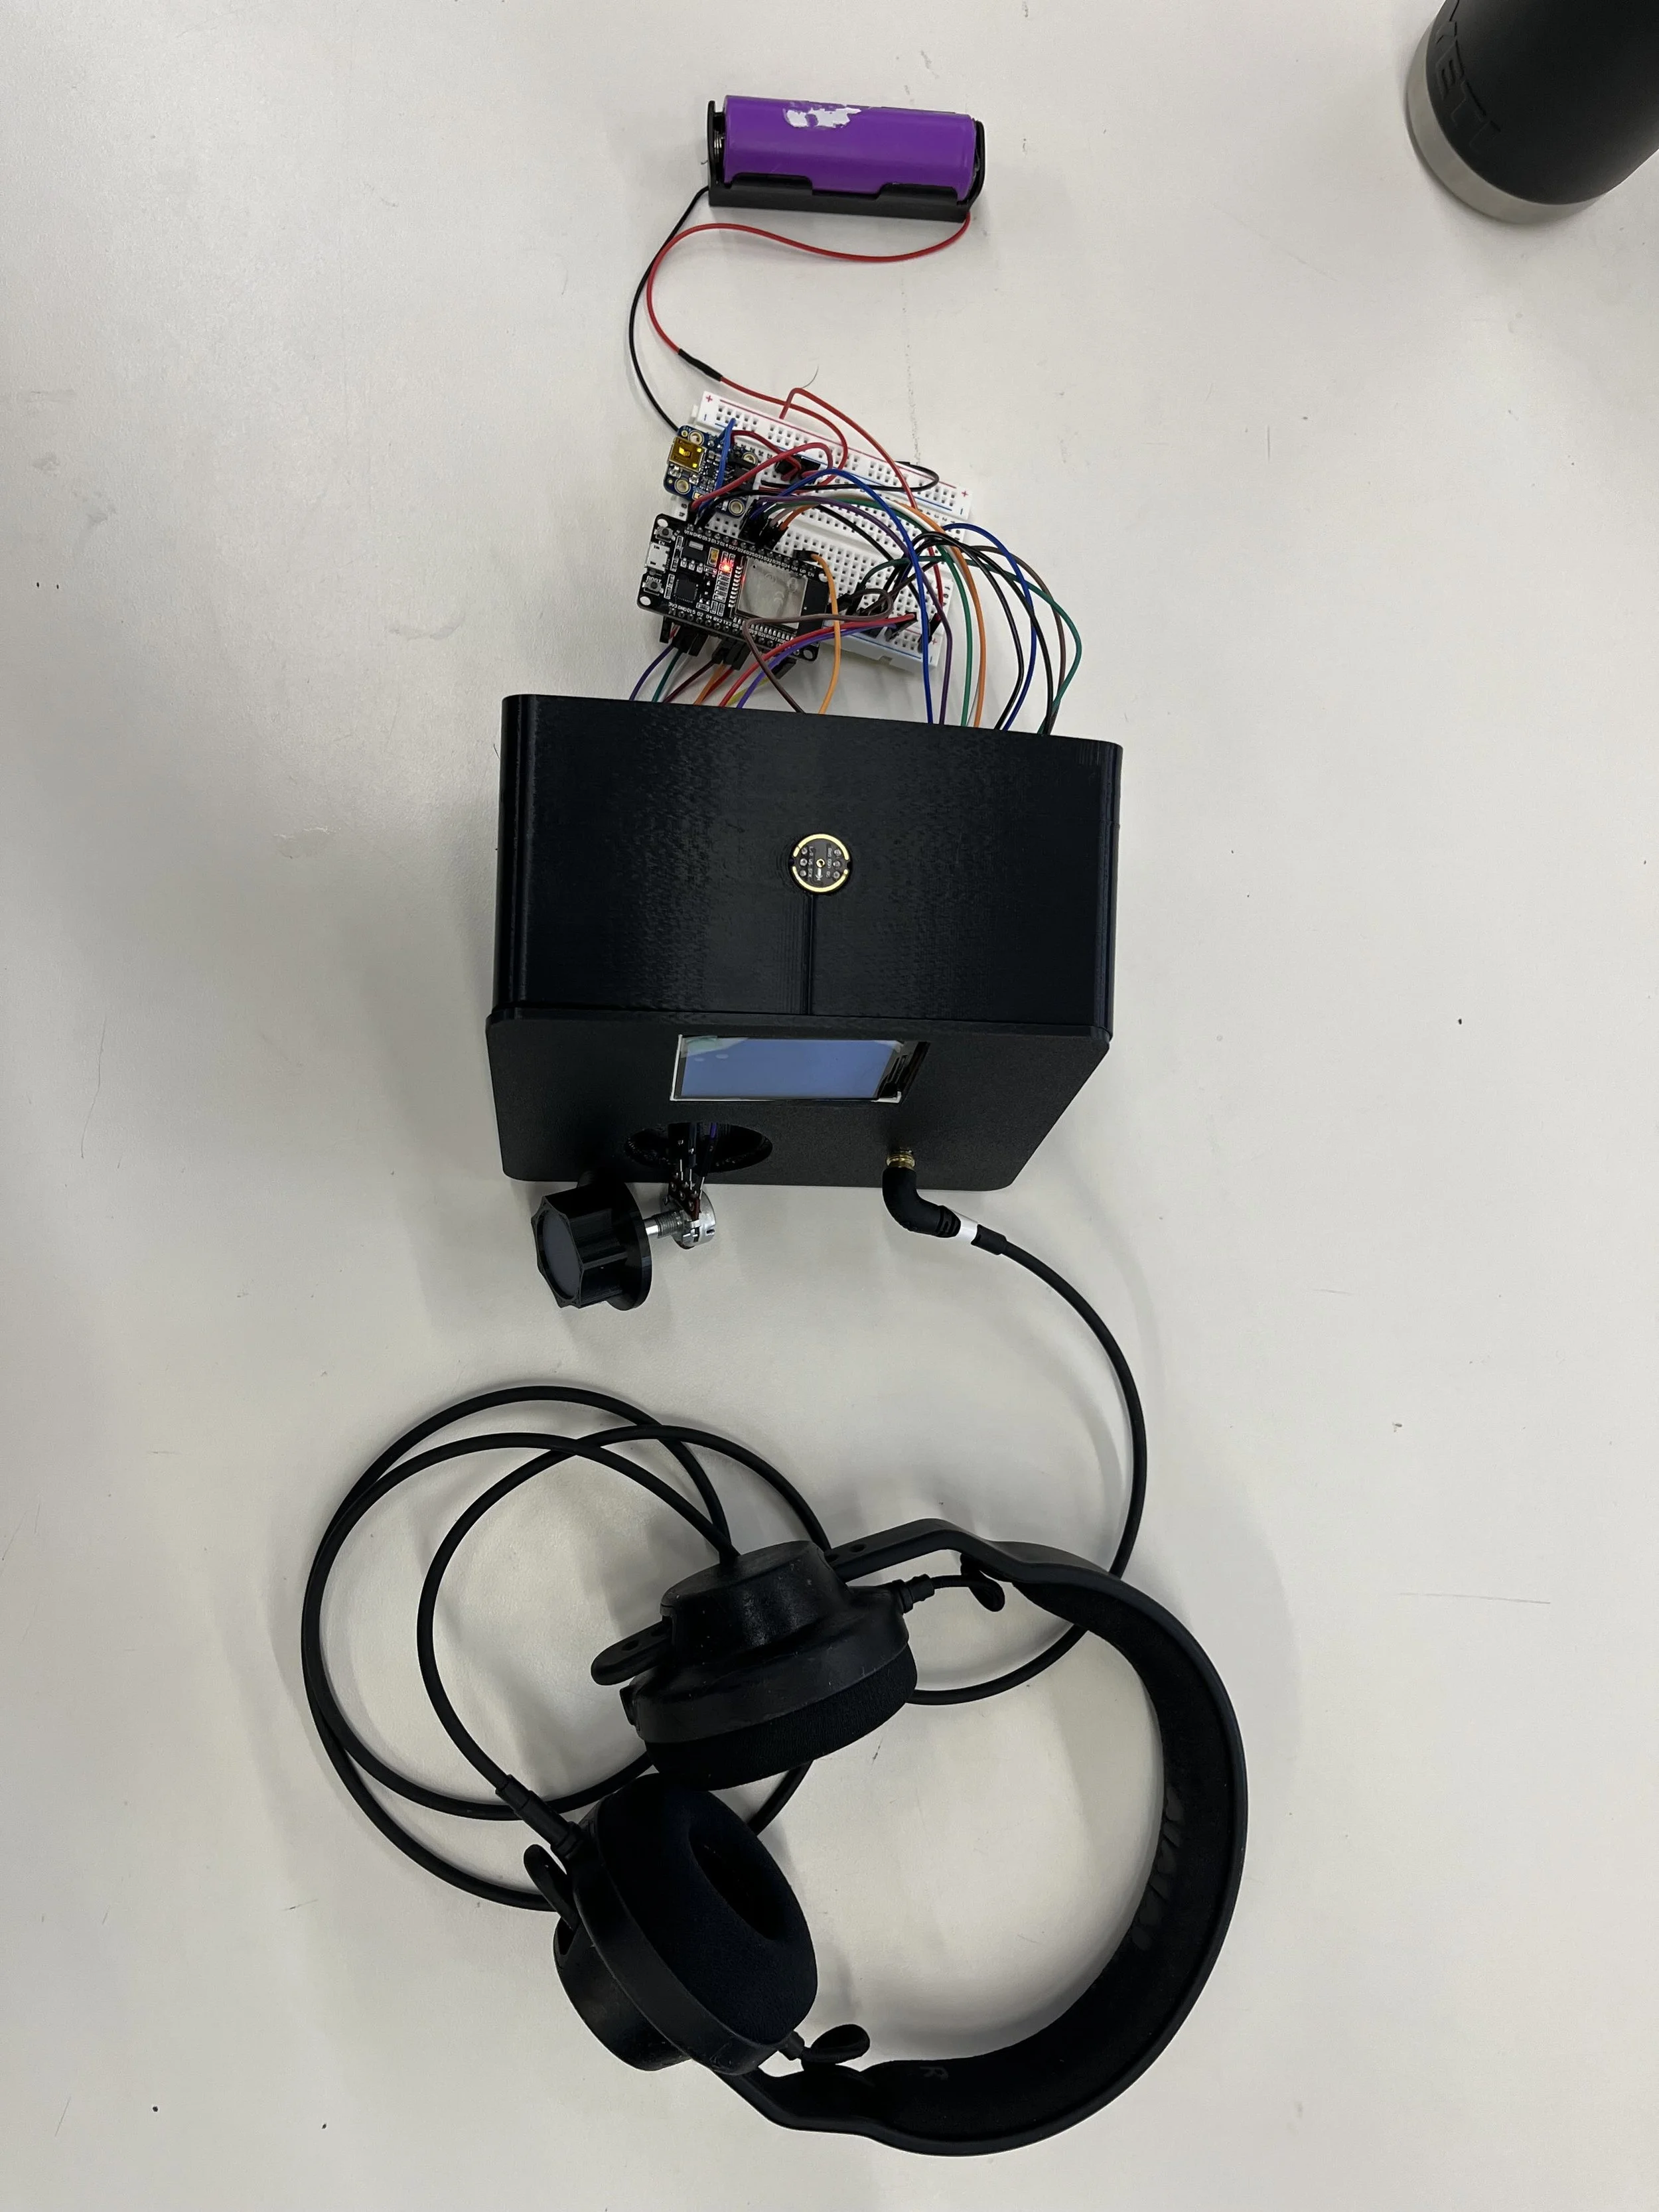
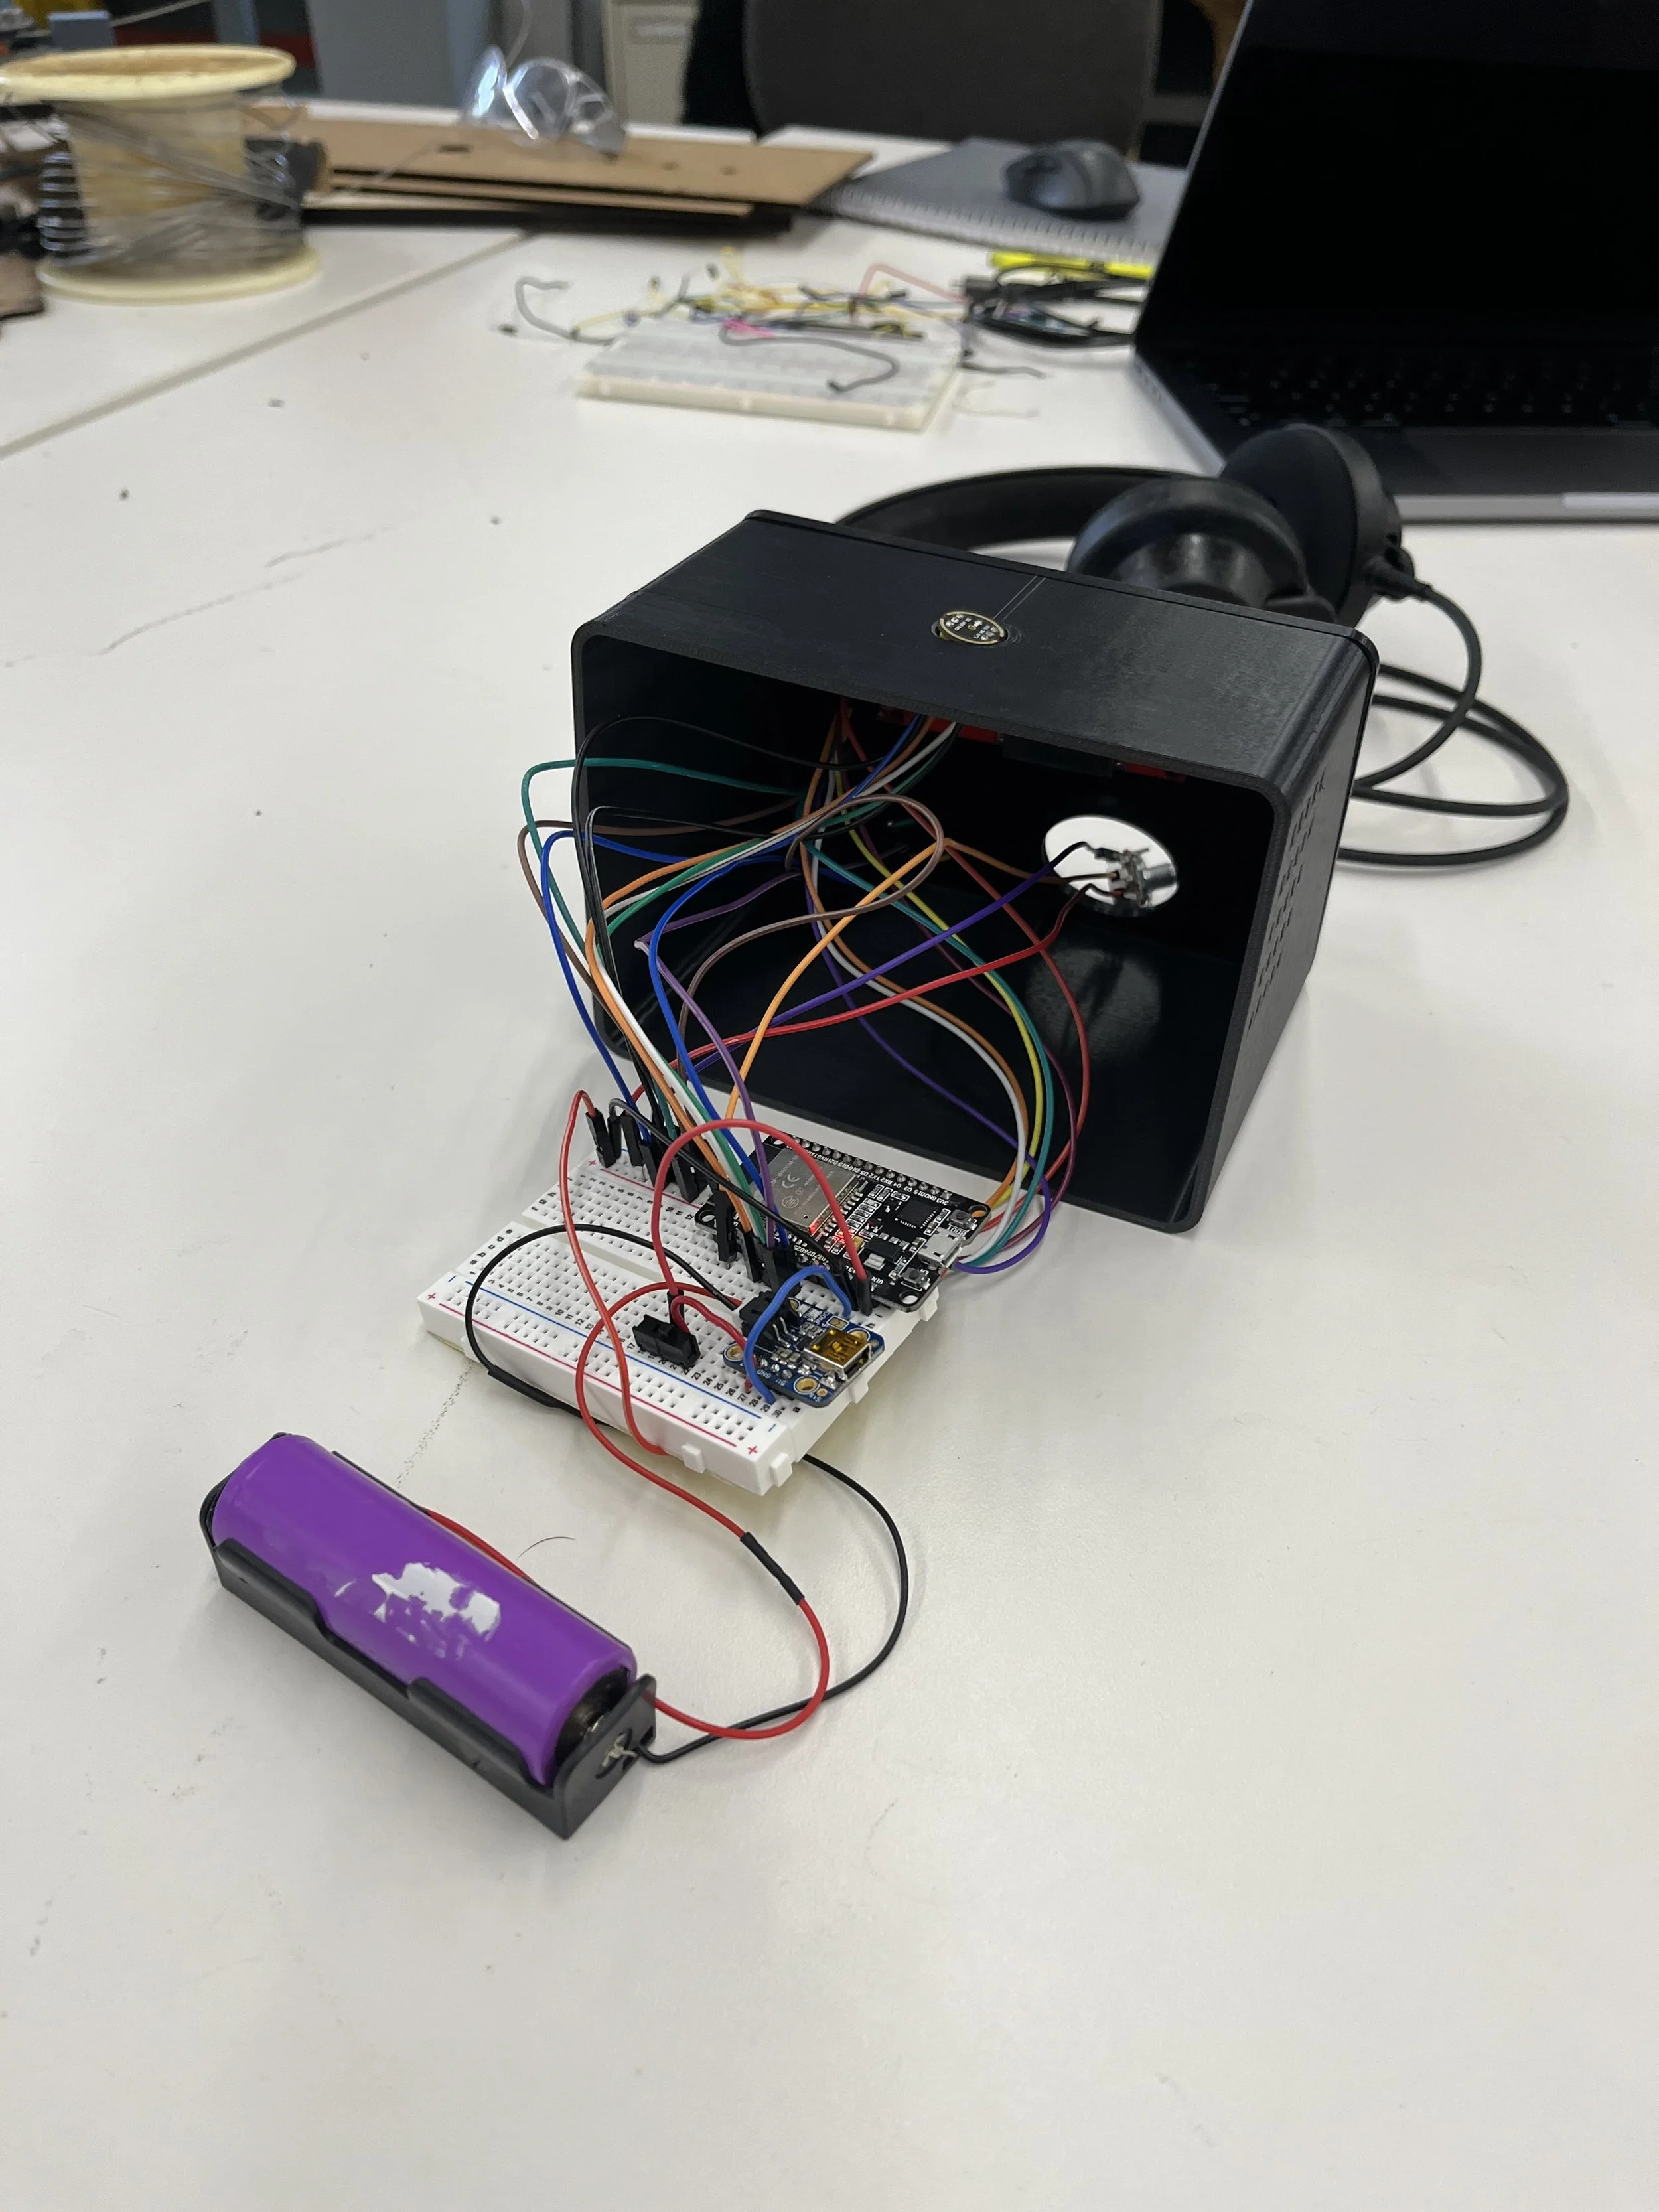
Bill of Materials:
1 x ESP-WROOM-32
1 x INMP441 Microphone
1 x Audio Jack 3.5mm
1 x Potentiometer
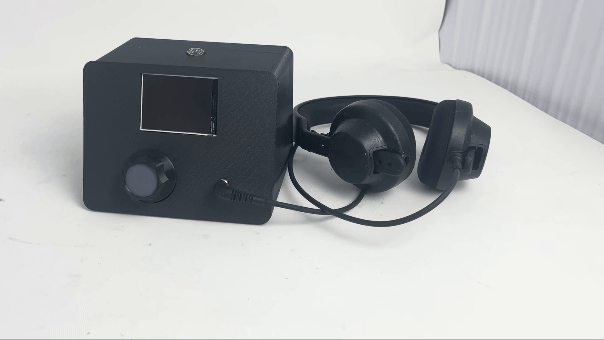
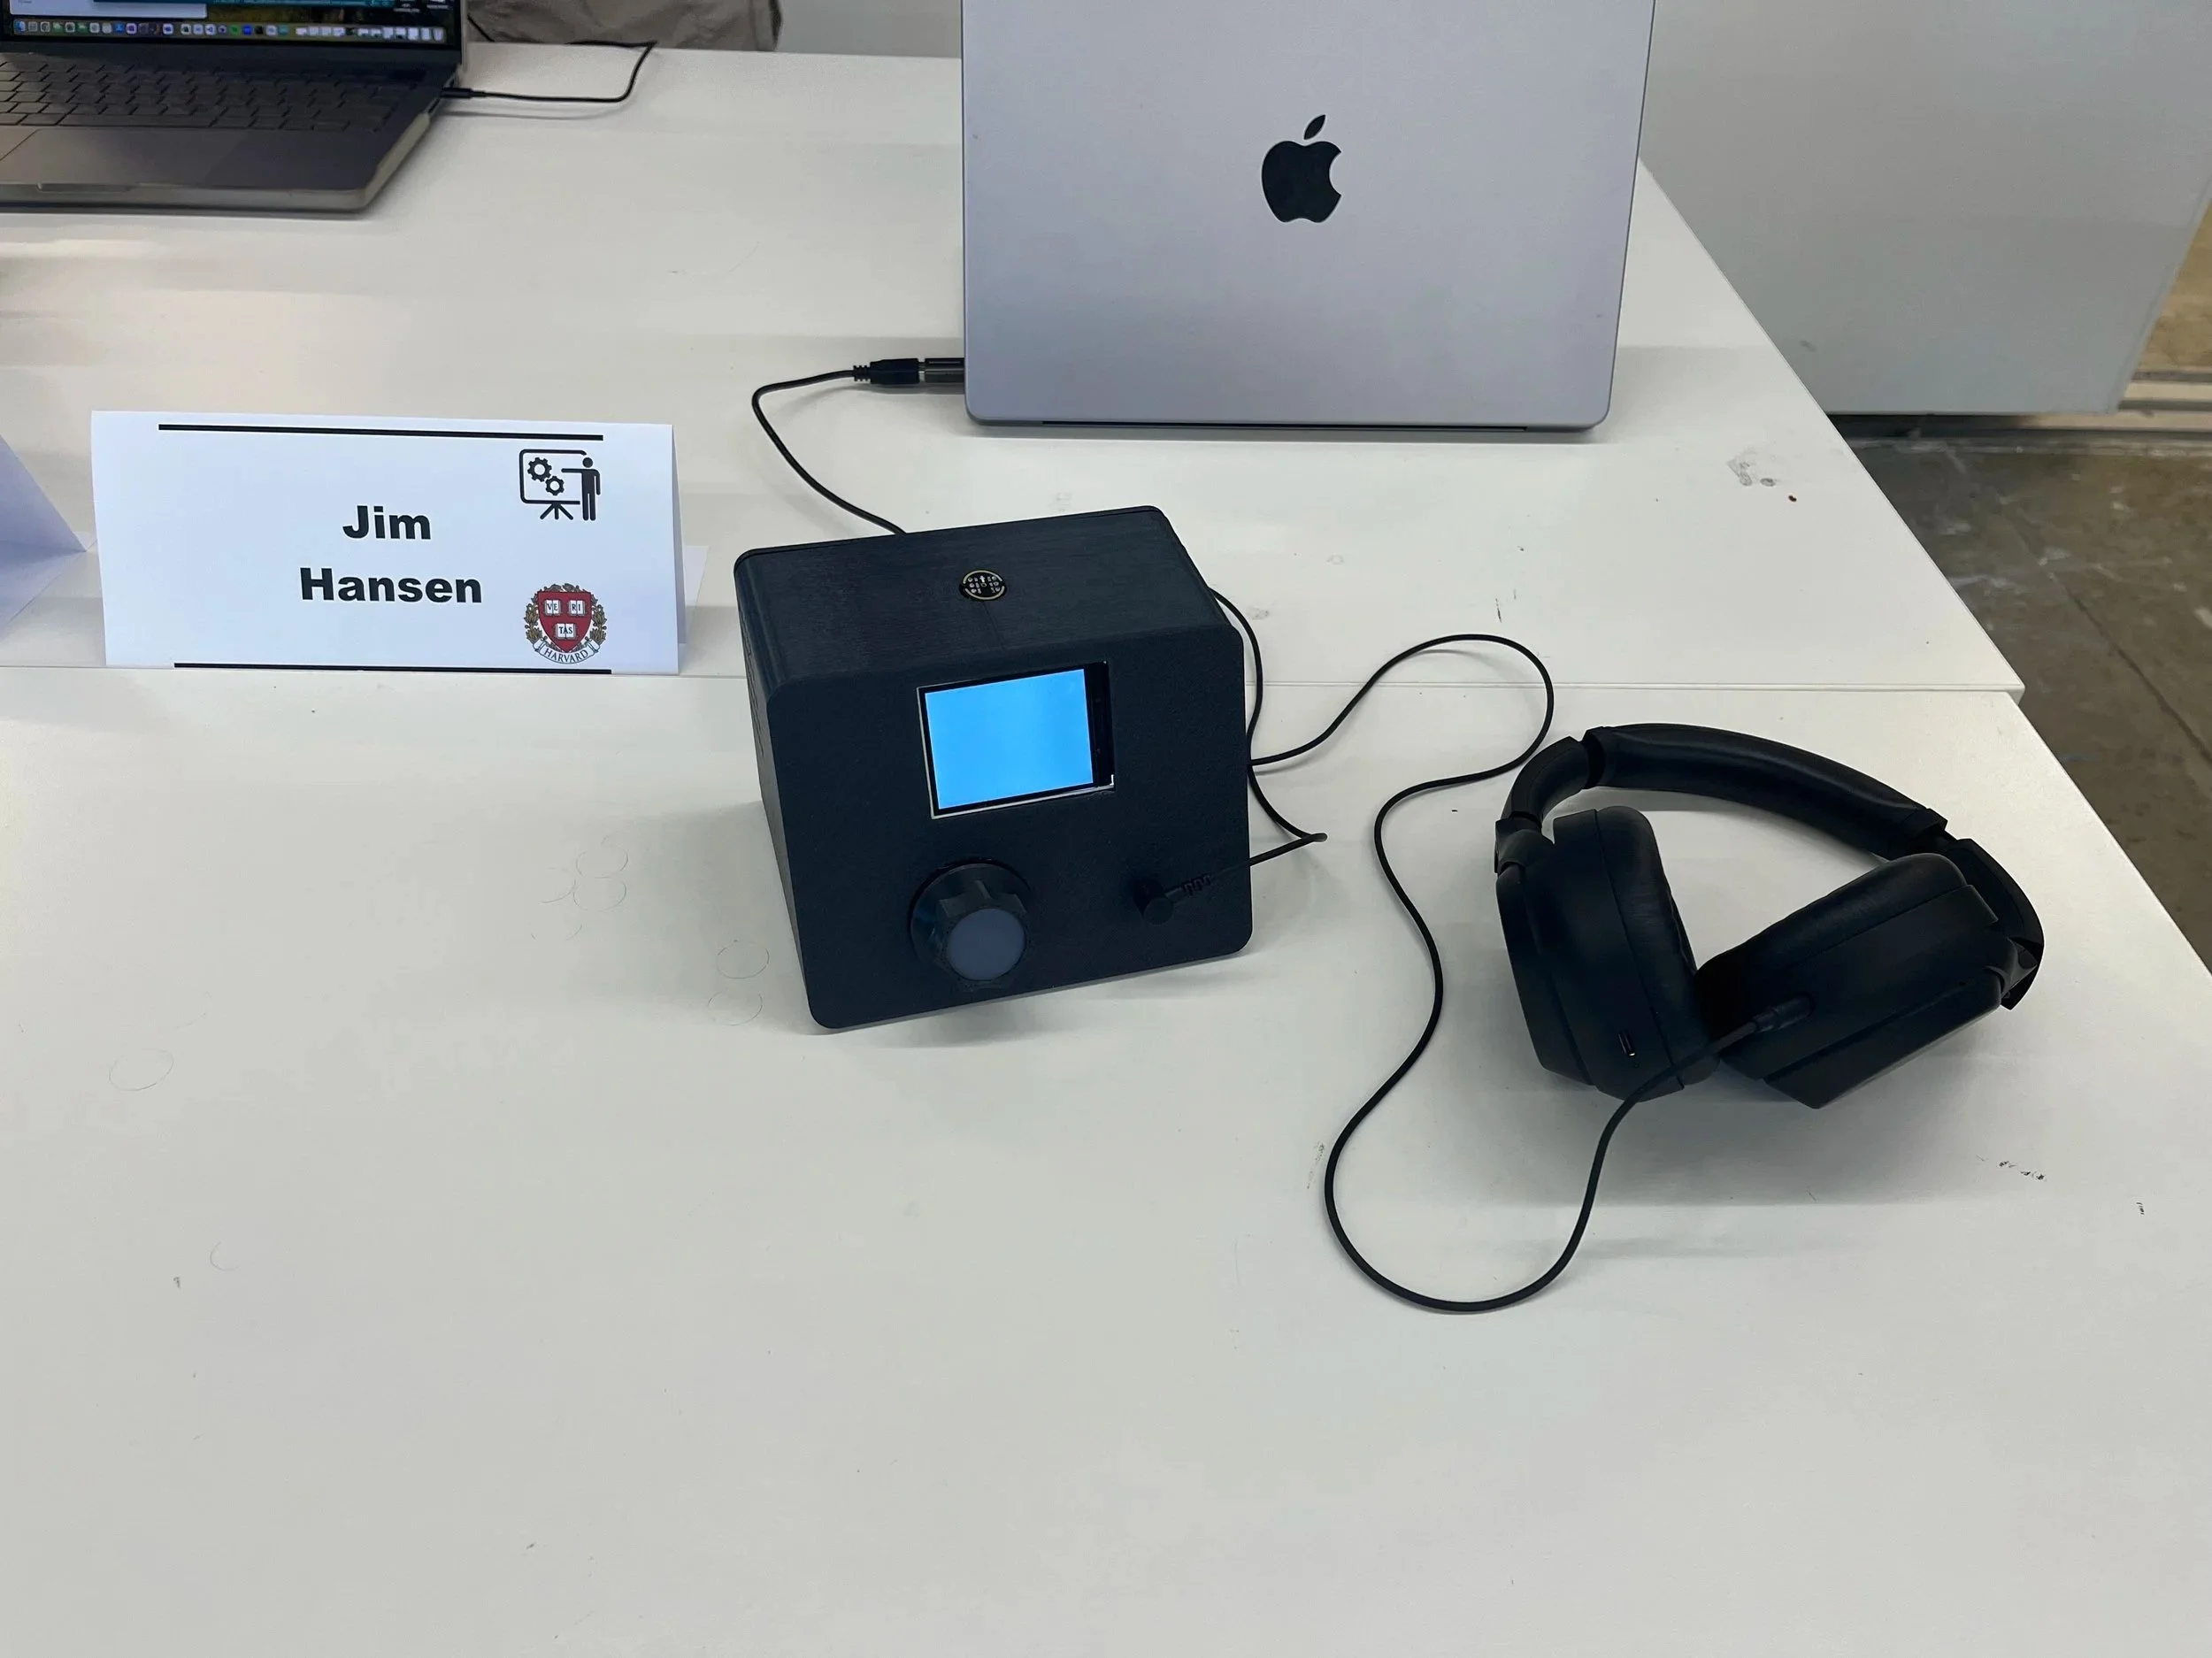
1 x 2.8" Dia. TFT Color LCD Display Touch Panel ILI9341
1 x Adafruit Micro-Lipo Charger for LiPo/LiIon Batt w/MicroUSB Jack - v1
1 x Li-Ion Rechargeable battery
1 x Headphones with Cord and 3.5mm Jack
OPTIONAL: 1 x Slide Switch EG1218
The circuitry is fairly simple driven by the ESP-WROOM-32 (ESP32). A rechargeable LiIon battery provides power via the Micro-LiPo Charger, including the optional Slide Switch to act as the power switch. The INMP441 Microphone takes audio in and passes to the Analogue Digital Converter of the ESP32. The ESP32 processes the audio using the I2S protocol (see programming section below). An analogue signal is read from the potentiometer to control audio volume. Then a video feed is generated on the TFT display and audio is sent out to the Audio Jack after passing through the Digital Analogue Converter.
HOUSING
I drew on inspiration from multiple audio devices when designing the housing. To name a few of notable ones from which I appropriated:
Braun Portable Radio
KEF Speakers
Marantz Amplifier
Revox MK III Stereo Tape Recorder
Moog Little Phatty and
Alpha Recording System Music Mixer Pro
The housing took many iterations. My initial design was closest to the Braun Portable Radio with a handle that doubled as a stand. After several failed attempts, I abandoned this idea. The reason that my designs kept failing was I pushed the tolerances of the 3D printer (less than 0.2mm) in the size and shape of key rotating connections. My goal was to achieve a slim frame design and thin handle (maximum 5mm), that rotated only 90 degrees and sat flush into the main body of the housing. Even just removing the supports from any slot less than 3mm in diameter to place the handle proved quite difficult.
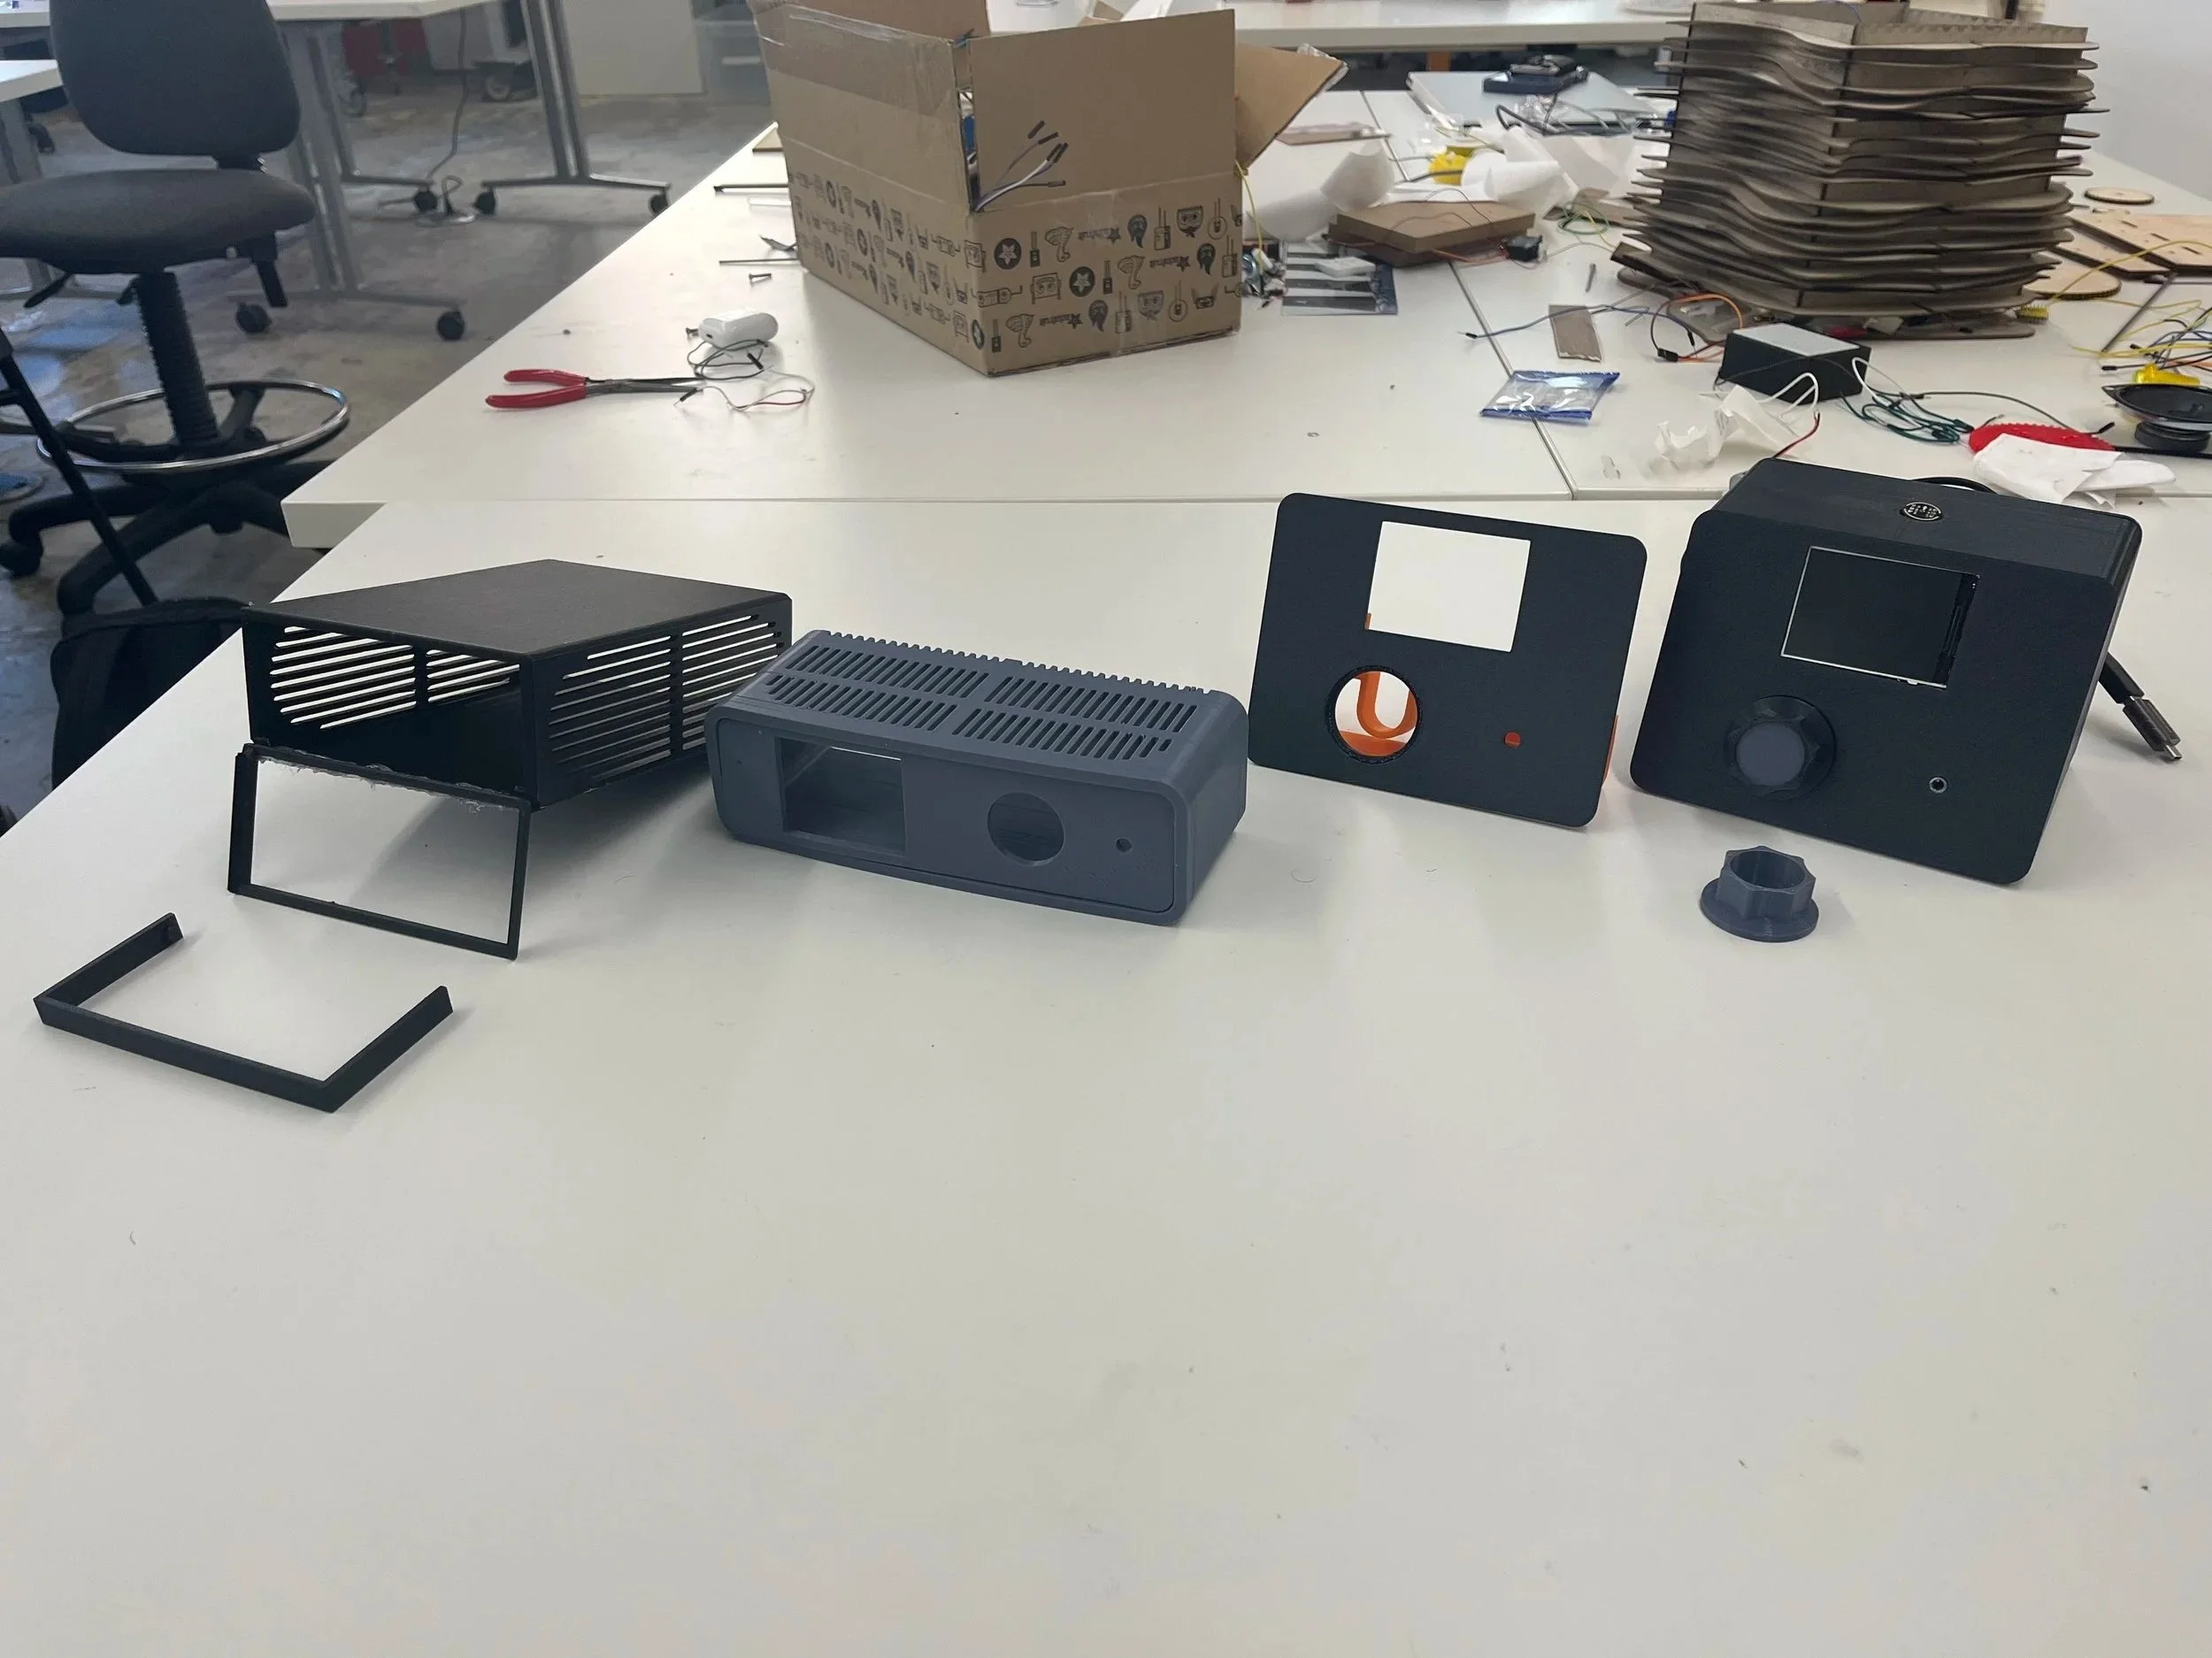
Instead I pivoted and chose an inclined front panel. This was easier to print and allowed for simpler customisation of the front panel. I could progress to focusing on how the front and back panels enclosed the circuitry. Affixing the screen, audio jack and knob took several tests to have each part able to withstand pushing and pulling.

I considered doing a resin print of the final design and then spray painting in a metallic finish, however the black PLA filament looked quite good so I stuck with this for the final form. Adding touches of blue took cues from the KEF speakers and Revox Tape Recorder.

CODING
The coding was the most challenging aspect of this project and remains the key for advancing this work in the future. The goal was to have all components integrated but I did not succeed in each working simultaneously before the end of the project. Below I have provided the code for each component working independently.
My code below is heavily adapted from the Drone Bot Workshop I2S tutorial.
~ audio ~
The microphone takes audio samples at a rate of 16000 Hz. They are then converted PWM signal using the I2S protocol. These samples are initially processed with a basic low pass filter and shifted to 8bit integer. They are saved in an array as a circular queue. The size is adjustable depending on the microprocessor's onboard memory. An interrupter function is then used to write the samples to the Digital Audio Converter and be played out through the audio jack.
The delay function is the first sound effect I added. This is written as a function that takes an audio sample as it is written to the DAC and played it adds the value to the buffer array at a offset in the future and a reduced value (x/3).
~ video ~
The video code is based on examples from the TFT_eSPI Library. The meter example has been adapted to show the amplitude of the audio signal using an analogue read from the microphone.
~ volume ~
The potentiometer code is the same example from the Drone Bot Workshop with an alternative radio station. I was not able to fully integrate into the other code.